How-To Guides
RV Solar Panel Tilt Mounts: Hardware, Seasonal Angles & Wind Safety (2026)
Seasonal angle table · Hardware specs from Renogy, Newpowa, BougeRV · Wind safety · October 2026
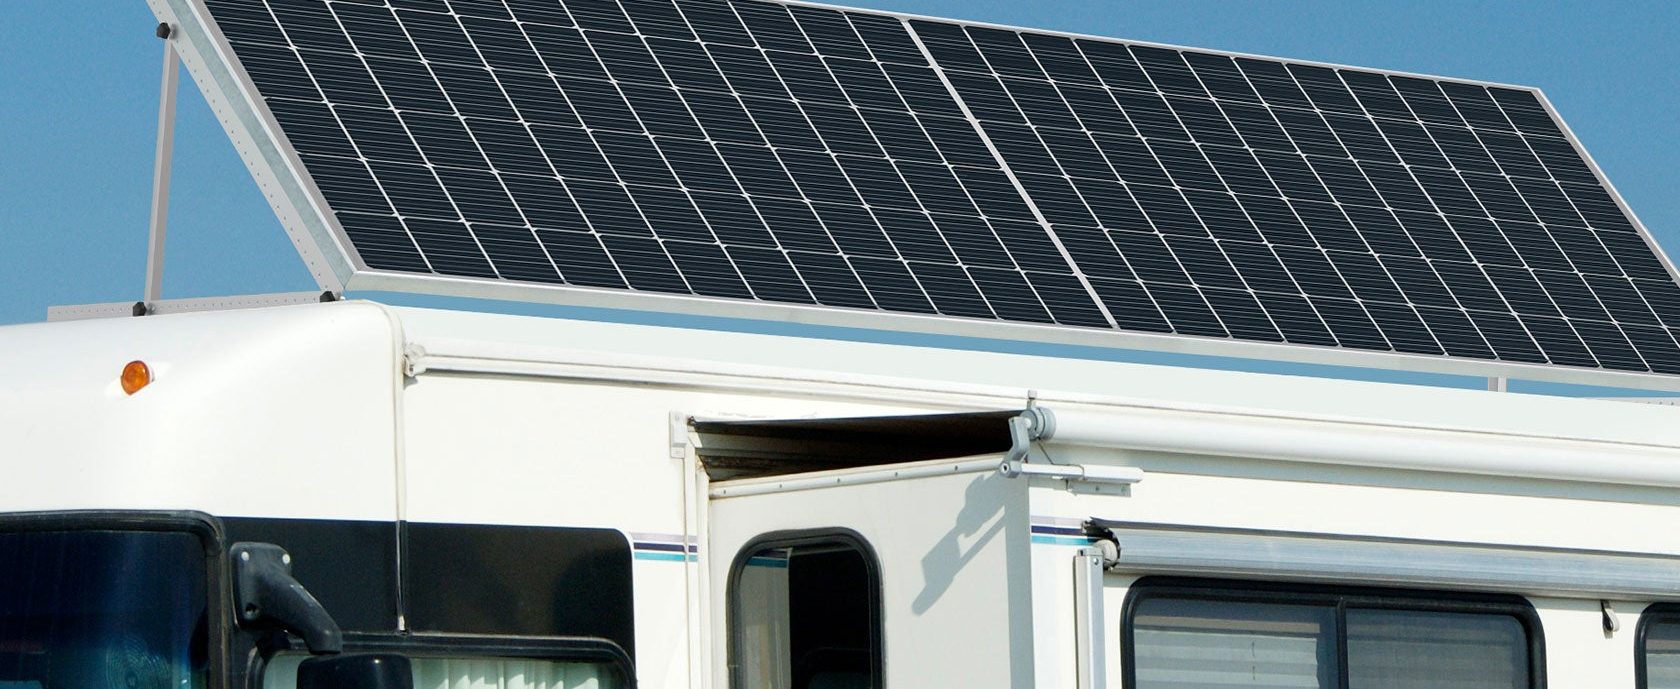
Flat on the roof is the worst angle for winter sun, and every RV roof is flat. Tilt mounts fix that by letting you angle panels toward the low winter sun, recovering 25 to 30 percent of lost output. But tilting adds cost, moving parts, and wind risk, and for many RVers an extra panel beats tilt hardware outright. This guide gives you the honest math, the hardware options, installation steps, a seasonal angle table, and the wind safety rules. For fixed mounting hardware, see our RV solar mounting guide.
Affiliate disclosure: RV Solar Power Guide is reader-supported. When you buy through links on this page, we may earn a commission at no extra cost to you. Our picks come from comparing verified specs and price. We don't accept payment for placement.
Winter gain
Tilting gains roughly 25-30% in winter, 15-20% spring/fall, 8-12% summer versus flat panels.
Winter angle rule
Latitude + 15 degrees. At 34N (Arizona), tilt about 49 degrees and face south.
Honest verdict
Tilt wins for stationary winter campers with limited roof. Most others gain more by adding a panel.
Driving rule
NEVER drive tilted. Lower and lock every panel before moving.
RV solar panel tilt mount guide
Roof safety: work with a spotter on the ladder, wear soft-soled shoes, and never stand on a tilted panel. If unsure about any roof or electrical work, consult a certified RV technician.
Why tilting works: the geometry in plain English
A solar panel makes full power only when sunlight hits it dead-on. Every degree off perpendicular costs output, following the cosine of the angle. A flat roof panel with the winter sun 45 degrees off perpendicular loses roughly 30 percent of its rated output, per published test analysis.
The sun's path changes with the seasons. In summer it arcs high overhead, so flat panels do fine (tilting gains only 8 to 12 percent, per a 6-month real-world test published by Project Solar DIY). In winter the sun stays low, especially at northern latitudes, and flat panels suffer most: that same test measured 25 to 30 percent gains from tilting in winter. Marketing that promises "30% more power" assumes constant adjustment in ideal conditions; the seasonal numbers above are the honest version.
Tilt vs fixed: the honest math
Take a 200W flat array in winter. Tilted at a 25 percent gain, it behaves like 250W. Now instead of buying tilt brackets, add a third 100W panel flat on the roof: 300W total, plus redundancy if one panel fails or shades. On power alone, the extra panel wins.
The cost framing agrees, per published analysis: quality tilt brackets run a meaningful amount per panel, so outfitting two panels with tilt hardware costs roughly what another 100W panel costs. The panel also has no moving parts to seize, no extra leak points, and no wind risk.
So when does tilting win? When the roof is the constraint. If there is physically no room for another panel, tilt hardware squeezes the most from the watts you have. It also wins for stationary winter campers (snowbirds parked for months) who adjust twice a year and never pay the daily setup cost. A popular hybrid: a flat roof array for baseline plus a portable panel you aim at the sun, which beats full tilt hardware on versatility.
When tilting makes sense (and when it doesn't)
Tilt if: you winter in one spot at higher latitudes, your roof has no room for more panels, you enjoy tinkering, or snow shedding matters (steeper tilt sheds snow that would otherwise bury flat panels).
Skip tilt if: you move frequently (setup fatigue is real), you camp mostly in summer, your sites are shaded (tilt cannot fix shade), or your roof has room for one more panel. Below 35 degrees latitude, the total annual gain from adjusting tilt is under 6 percent: fix and forget, per installer-published data.
Tilt bracket hardware types
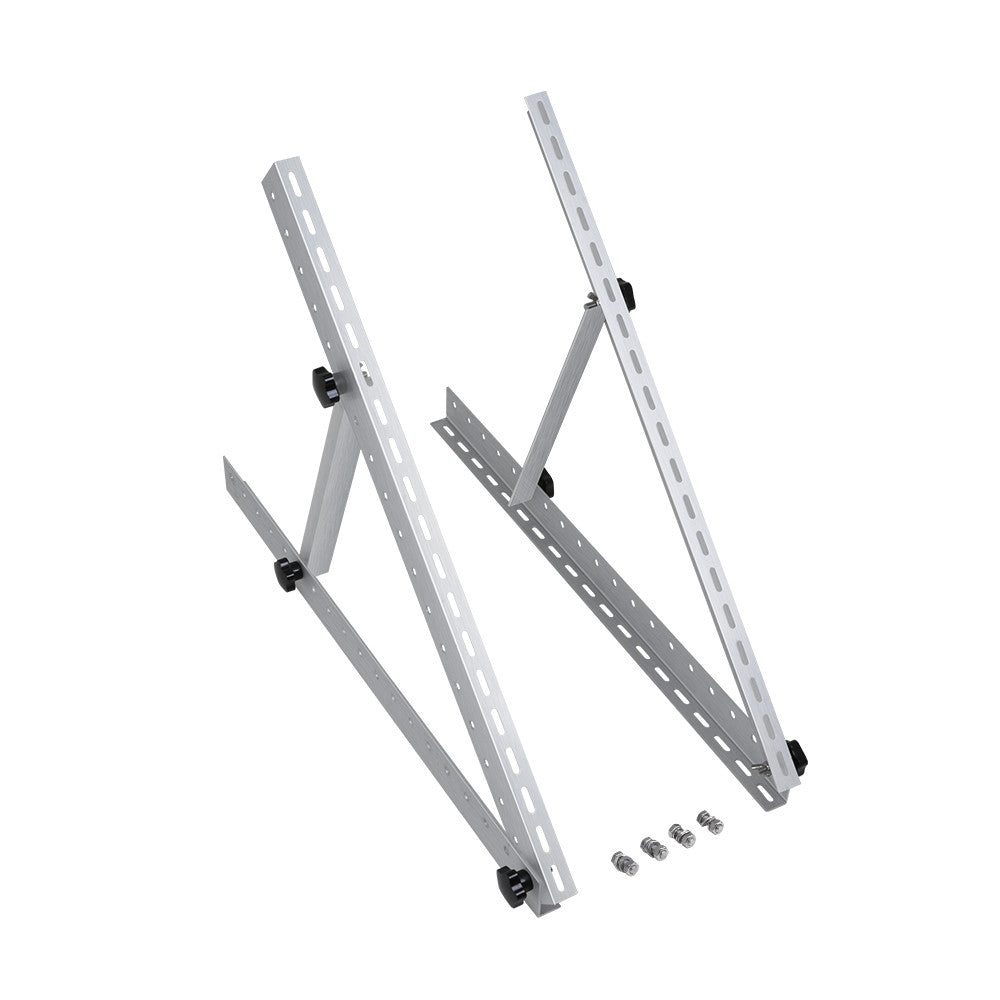
Product names only; no prices, no affiliate links. Specs below are manufacturer-published.
- Foldable tilt-leg brackets (e.g., Renogy 28" and 50"): the most common RV option. 0 to 90 degrees of adjustment (usable range shrinks with bigger panels). The 28-inch suits panels under about 100W; the 50-inch handles up to around 550W. Aluminum with stainless fasteners, about 3.5 lbs per set. Per Renogy's own manual, they are designed for tilting when parked and riding flat and locked in motion.
- U-bracket systems (e.g., BougeRV 28"/41"): U-shaped aluminum brackets supporting up to about 300W, RV and marine focused. Simple and sturdy, fewer adjustments than foldable-leg designs.
- Multi-panel tilt racks (e.g., ECO-WORTHY): galvanized steel three-leg structures holding 1 to 4 panels (100-400W) at 18 to 30 degrees. Better for larger arrays that tilt as a unit.
- Heavy-duty adjustable (e.g., Rich Solar MEGA): aluminum alloy mounts in 15-30 and 30-60 degree ranges, matched to larger panels.
- DIY L-bracket + prop rod: the long-timer boondocker classic. Aluminum angle stock, stainless hardware, and a prop rod with multiple holes for angle selection. Cheapest option, most labor, and only as good as your sealing job.
One spec worth noting: Newpowa publishes a 90 MPH wind load rating for its tilt brackets. Treat named ratings as data points for that hardware, not guarantees for every install.
Installing tilt mounts, step by step
- Plan tilt direction before drilling. The hinge goes on one long edge of the panel, the adjustable legs on the opposite edge. Decide which way the panel will face when tilted (usually south), and consider your typical parking orientation: many RVers hinge on the street side so panels tilt toward the curb-side sun.
- Test-fit on the ground. Assemble brackets to the panel, run through the full tilt range, and confirm locking pins or knobs engage positively at each detent. Finding a binding hinge is much easier at ground level.
- Mount the feet per the sealing guide. Tilt brackets use the same roof feet as fixed mounts: butyl tape under, lap sealant over. Do not re-learn this here; follow our sealing and maintenance guide exactly, since tilt hardware adds more roof penetrations than fixed brackets.
- Prefer short-side mounting. Mounting brackets on the panel's short sides keeps the raised profile lower and less wind-prone than long-side mounting, per experienced installer guidance.
- Torque and lock-check everything. Tighten all hinge and leg fasteners to a firm hand-tight plus a quarter turn (no published torque spec exists for most kits; snug without crushing aluminum). Verify each locking pin seats fully.
- Do a first-tilt test on the roof. Raise, lock, lower, and re-lock each panel. Confirm nothing binds, nothing contacts vents or the AC shroud at full tilt, and the panel sits truly flat when lowered.
Seasonal tilt angle table
The widely used rule, confirmed across multiple installer sources: annual fixed tilt = your latitude; winter = latitude + 15 degrees; summer = latitude - 15 degrees; spring/fall = latitude. An RV-specific winter formula from long-term boondockers refines this to (latitude x 0.89) + 24 degrees.
Ready table (tilt degrees from horizontal, face south):
- 25N (South Texas/Florida): winter 40, shoulder 25, summer 10
- 30N (Gulf Coast): winter 45, shoulder 30, summer 15
- 35N (Arizona/North Carolina): winter 50, shoulder 35, summer 20
- 40N (Colorado/New Jersey): winter 55, shoulder 40, summer 25
- 45N (Minnesota/Maine): winter 60, shoulder 45, summer 30
- 50N (Canadian border): winter 65, shoulder 50, summer 35
Adjust twice a year: winter angle in mid-September, summer angle in mid-March. That captures most of the gain; fiddling every few weeks adds little. Apps like Sun Surveyor or Sun Seeker fine-tune for your exact spot and date. Remember: facing south at a slightly wrong tilt beats facing away at a perfect tilt.
Parking and orientation
Tilt direction is fixed at install time, but the RV rotates. Park with the tilted face toward the south whenever the site allows. Morning versus afternoon sun is a wash over the day for most campers; if you adjust once daily, split the difference and favor the afternoon, when batteries are finishing absorption.
At install time, think about which side of the RV you usually park toward the sun. Curb-side tilting suits pull-through sites where the door side faces south; street-side suits back-ins. There is no universal answer, which is why planning tilt direction before drilling matters.
Wind-load and driving safety
Never drive with panels tilted. Highway speeds create aerodynamic forces equivalent to a severe storm on a raised panel, and tilt brackets are engineered to ride flat and locked. Make lowering the panels a departure checklist item, alongside the antenna, awning, and steps.
- Lower in forecast high winds even while parked. One experienced RVer reports surviving 40 mph winds tilted, but treats it as luck, not a rating.
- Short-side mounting keeps the raised profile lower and catches less wind.
- Cheap brackets break. Moving parts add failure points; buy hardware with stainless fasteners and positive locking, not friction-only knobs.
- After washboard roads, re-check every locking pin before the next tilt. Vibration is the enemy of friction locks.
Manual vs automatic tilting
Manual (pins, knobs, prop rods) wins for RVs: cheap, reliable, nothing electrical to fail, and you are already on the roof for inspections. The cost is a roof climb per adjustment, which is why twice-yearly changes are the sweet spot.
Linear actuators offer push-button tilt at the cost of money, wiring, weight, and another motor to fail in the weather. Single-axis trackers that follow the sun all day are overkill on an RV roof: the mechanism costs more than the extra panel that would beat it. For RVs, manual is the rational choice.
Maintenance and winter care
- Seasonal hinge check: inspect hinges, pins, knobs, and prop rods each spring and fall. Look for corrosion, bent legs, and wallowed-out holes.
- Lubricate sparingly with dry silicone spray, not oil that attracts dust and grit.
- Retorque after the first 500 miles and after any serious washboard road. Then annually.
- Winter: steeper tilt sheds snow that would bury flat panels; pair with a soft snow brush, never a metal shovel. Snow cover, not cold, is what kills winter output.
- Seal inspections matter more with tilt hardware because there are more roof penetrations and more movement. Fold this into the routine in our sealing and maintenance guide.
Frequently asked questions
How much more power do tilted RV solar panels make?
Real-world testing finds roughly 25 to 30 percent more in winter, 15 to 20 percent in spring and fall, and 8 to 12 percent in summer versus flat panels. The marketing claim of 30 percent assumes constant adjustment and ideal conditions. For most RVers, the winter gain is the one that matters.
What angle should I tilt my RV solar panels in winter?
The widely used rule is latitude plus 15 degrees for winter. At 34 degrees north latitude (southern Arizona), that means about 49 degrees of tilt. An RV-specific winter formula from long-term boondockers is latitude times 0.89 plus 24 degrees, which gives 54 degrees at 34N. Face the tilted panels south.
Is it worth tilting RV solar panels or adding more panels?
For most RVers, adding another flat panel wins: a 200W array tilted at 25 percent gain behaves like 250W, while adding a third 100W panel flat gives 300W, plus redundancy if one panel fails. Tilting wins only when roof space is the constraint and you camp stationary through winter.
Can I drive with my solar panels tilted up?
Never. Highway speeds create forces equivalent to a severe storm on a tilted panel, and tilt brackets are designed to hold panels flat and locked while in motion. Lower and lock every panel before moving the RV, and make it a checklist item alongside the antenna and awning.
What wind speed can tilted solar panels handle?
There is no universal rating; it depends on the bracket hardware and install quality. Newpowa publishes a 90 MPH wind load rating for its tilt brackets as a named example. One long-term RVer reports surviving 40 mph winds while tilted, but treats it as luck rather than a rating. Lower tilted panels when high winds are forecast.
Do tilt brackets work on curved RV roofs?
They are harder to fit well. Most tilt bracket kits assume a flat mounting surface, and a curved roof makes hinge alignment and sealing tricky. On curved or pop-top roofs, flexible panels or portable ground panels are usually the more practical choice.
How often should I adjust the tilt angle?
Twice a year is the practical answer for most RVers: set the winter angle in mid-September and the summer angle in mid-March. Adjusting every 6 to 8 weeks squeezes a bit more, but the twice-yearly change captures most of the gain. Below 35 degrees latitude the total gain from adjusting is under 6 percent, so many southern campers fix and forget.
Will tilting void my solar panel warranty?
Tilting itself does not void panel warranties, which cover the panel, not the mount. What can cause trouble is wind damage from driving tilted or a bracket failure that cracks the panel frame. Check your panel maker's warranty terms for exclusions around improper mounting, and never drive with panels raised.
Manual vs automatic tilt for RV: which is better?
Manual wins for RVs. Pins, knobs, and prop rods are cheap, reliable, and have nothing electrical to fail. Linear actuators add push-button convenience but bring cost, wiring, weight, and another failure point. Single-axis trackers are overkill for an RV roof.
Do I need to tilt portable solar panels too?
Portable and suitcase panels benefit from the same geometry: prop them to face the sun and you get the same percentage gains. Many suitcase kits include adjustable legs or a kickstand for exactly this. It is easier than roof tilting because you just move the panel, and aiming at the sun through the day beats any fixed angle.